QuickBooks Export
Simplify Your Accounting Workflow
Workstaff’s QuickBooks Export helps you move from invoices to accounting exports in minutes. Here’s what it provides:
- Reliable exports: Generate customer and invoice files directly from your Workstaff client's data.
- Map data in QuickBooks: Keep Products & Services aligned with your QuickBooks setup.
- Less manual work: Reuse your existing clients and invoicing data to prepare import-ready files.
QuickBooks Export lets you export data from the Client Pricing Report view and import it into QuickBooks Online (QBO):
- a Customers file (
.xlsx) - an Invoices file (
.csv)
QuickBooks and Workstaff notions
Before diving into the QuickBooks export, it is important to clarify some notions.
In Workstaff, clients cannot be billed yet. We provide a pricing report view that allows you to prepare billable pricing data for worked shifts. In QBO, those clients are called customers and the pricing document is called an invoice.
QBO requires each invoice's line item to be associated with a Products & Services (P&S). This notion does not exist in Workstaff but can be linked to earnings code, and requires a manual mapping to be done beforehand.
1. Configure Products & Services mapping
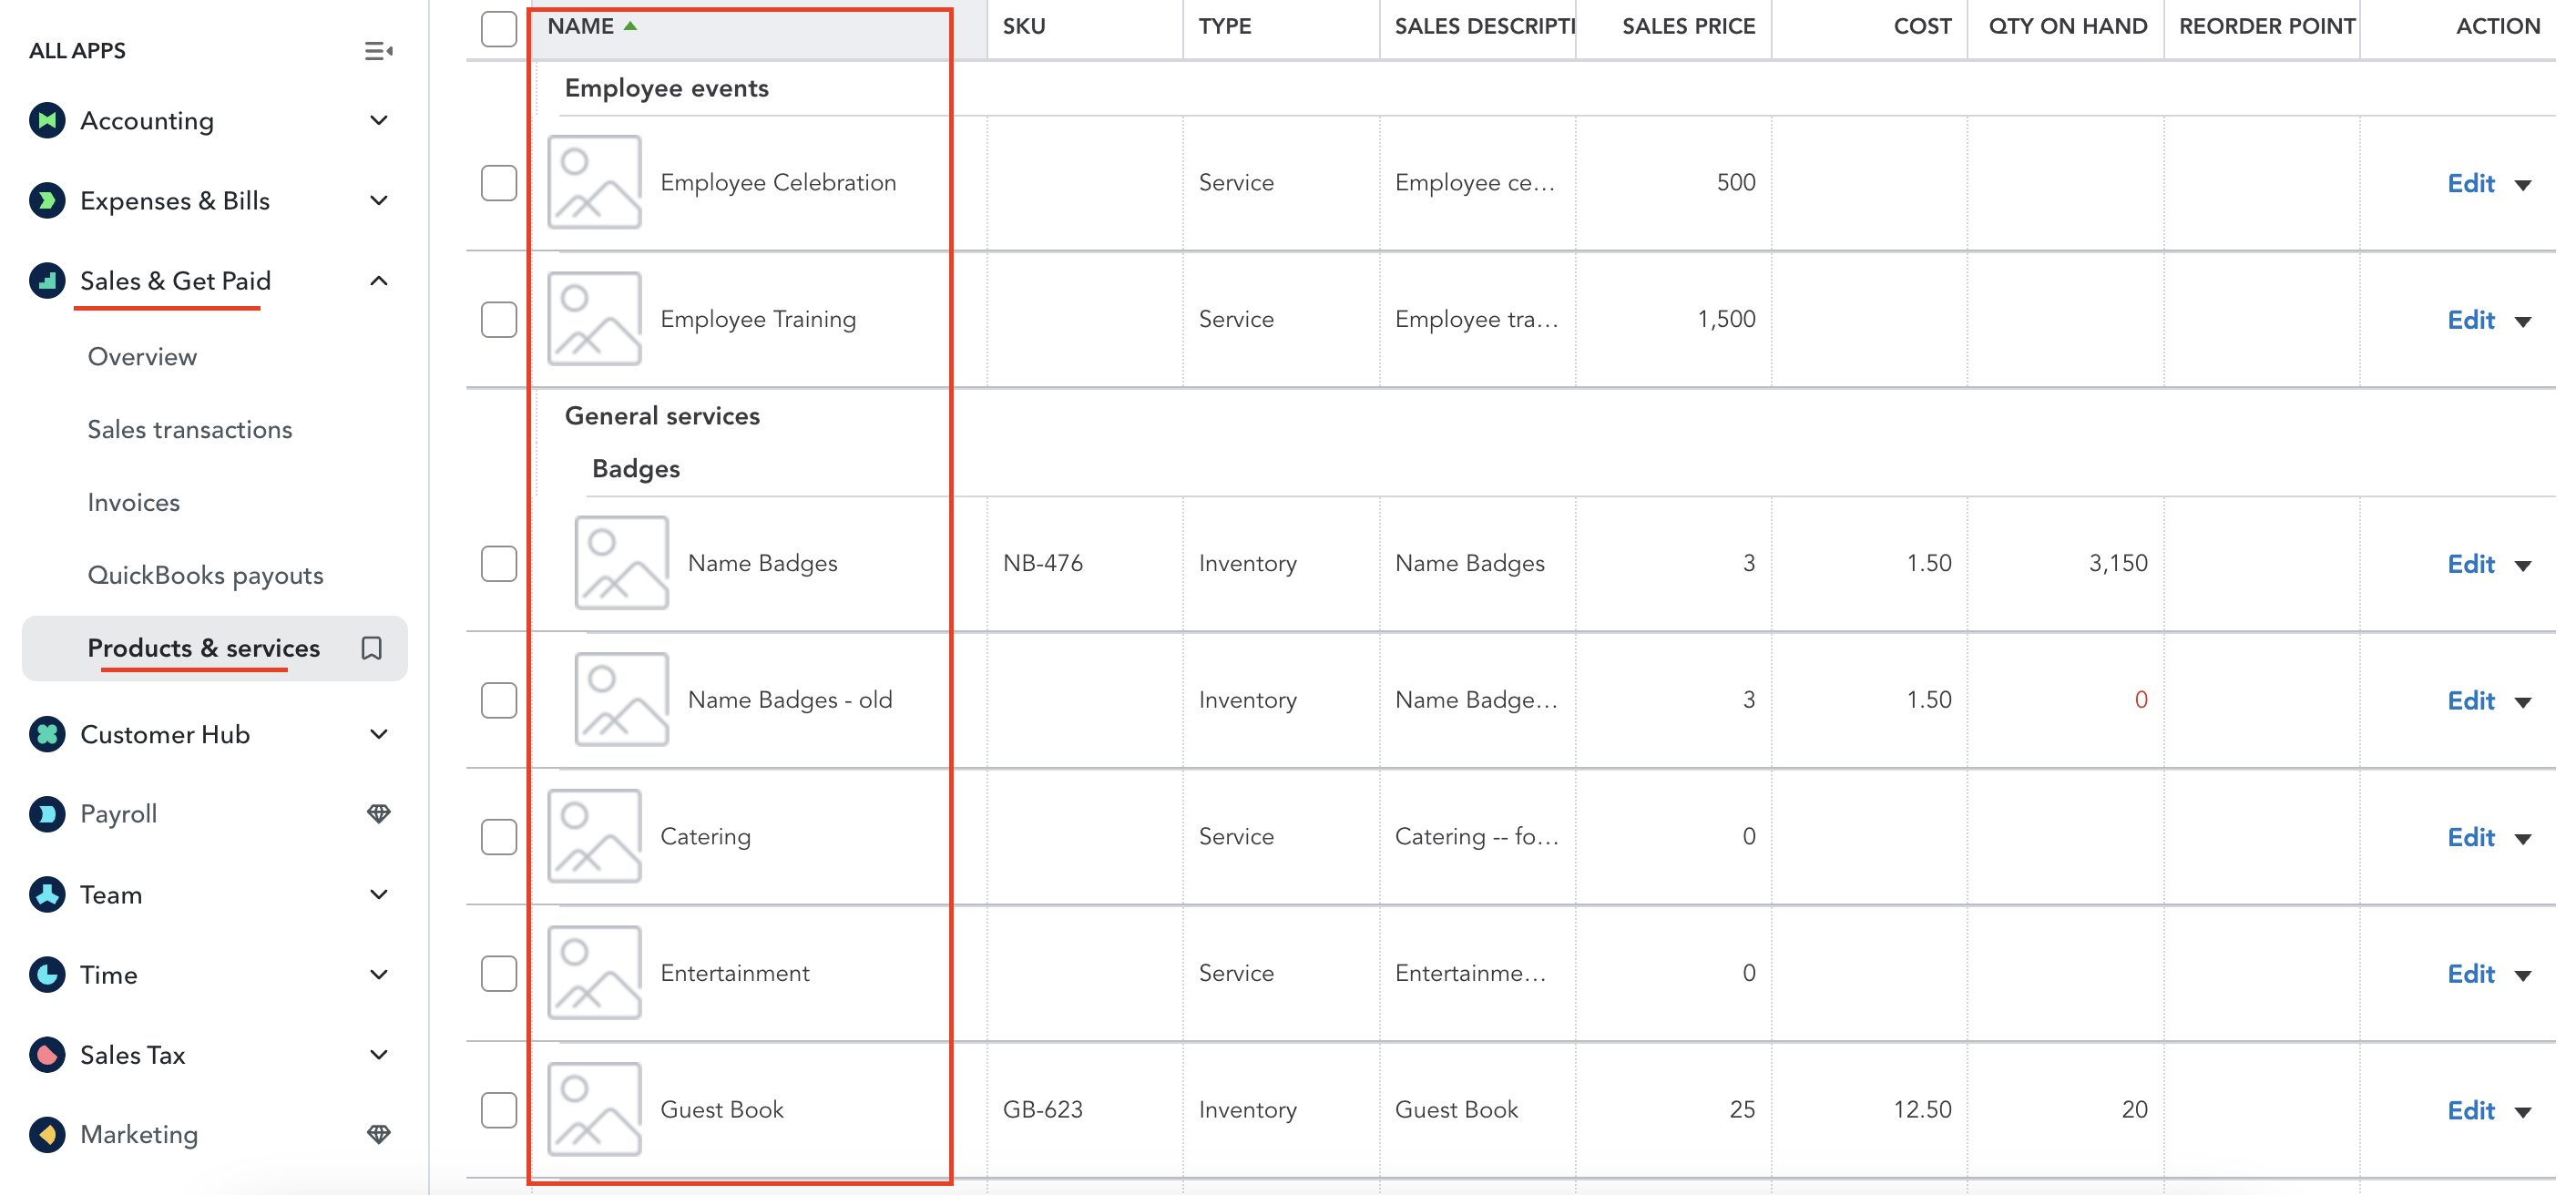
In the add-on configuration, you must map each Workstaff wages earnings code to a QBO P&S name. The P&S are managed in QBO under Sales & Get Paid > Products & Services.
There is also a "Group invoices by" setting that will determine if the invoices are generated per client or per project.
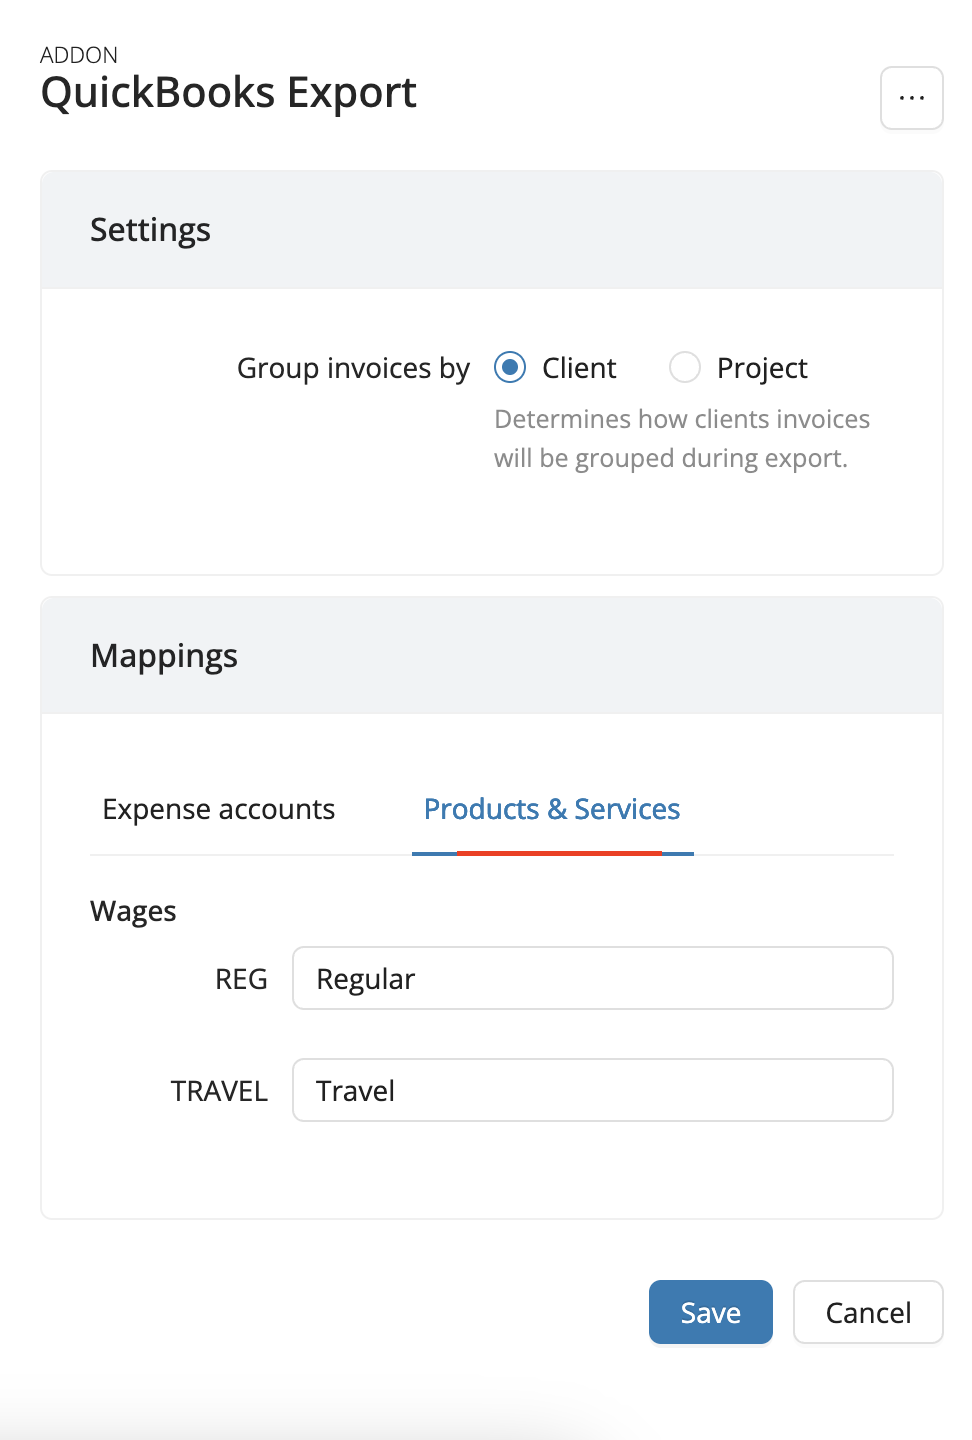
This mapping fills the Item(Product/Service) column in the invoice export.
The invoice export can fully work only if the mapping is completed.
2. Download Customers and Invoices from Client Pricing
From the Reports > Client Pricing view, use the QuickBooks export actions to download Customers and Invoices
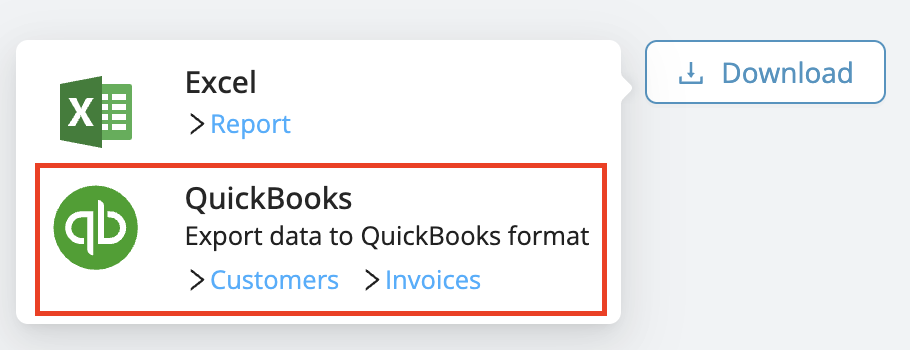
QBO provides a checkbox to add non-existing customers directly from invoice import, but this option is limited. We recommend importing customers first and then the invoices.
QBO supports a detailed import, but Workstaff will only fill specific columns that can be mapped with the system. The rest of the columns are left blank but can be edited manually after export.
How customers columns are populated
Name: client's contact full name or the client nameCompany: client nameEmail: contact emailPhone: contact phone numberStreet-City-Province-Postal code-Country: extracted from the client's location
If any information is missing, you can add it directly in the client profile. For more details, see Manage your client list.
How invoices columns are populated
*InvoiceNo: the format istoday_date-WS-invoice_number, for example20260323-WS-0034.*Customer: client name*InvoiceDateand*DueDate: last day of the exported window.Item(Product/Service): value from Products & Services mappingItemDescription: the format isProject name-SkillItemQuantity: always1ItemRate: total applied for the item*ItemAmount: total applied for the item*ItemTaxCode: alwaysN/A. Workstaff does not yet support tax settings per client.
Fields with an asterisk (*) are mandatory in the export.
When importing Invoices, the matching on the Customer will be done on QBO Display name. Since this field can have several values,
make sure it is set to match the WorkStaff client name.
3. Tax behavior
Workstaff does not calculate QuickBooks taxes during export.
- You can manually add a tax code in the
*ItemTaxCodecolumn. - In QBO, make sure tax codes exist. See the next section for detailed instructions.
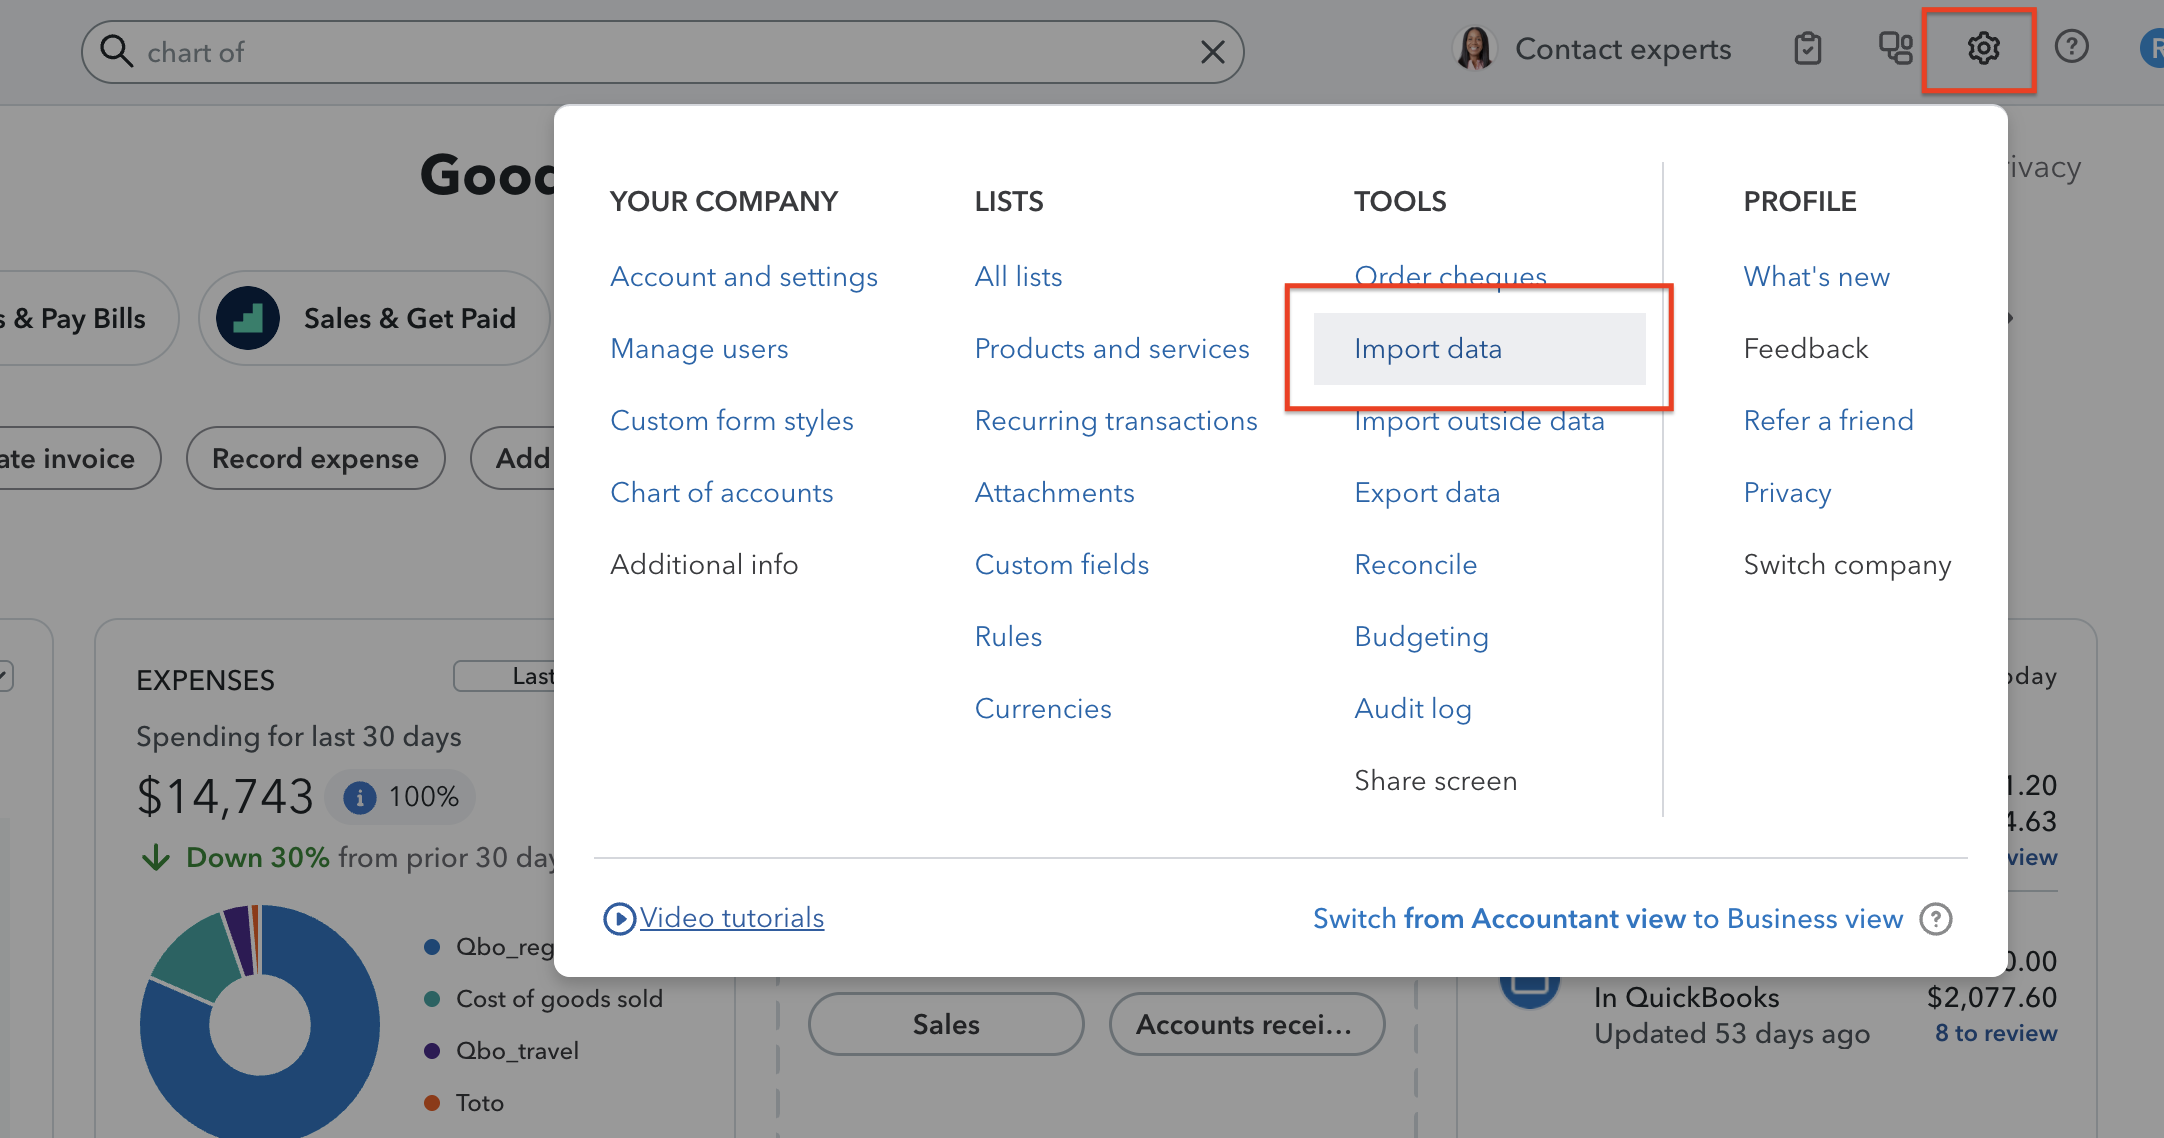
4. Access the import menu in QBO
In QuickBooks Online:
- Click the Gear icon (top right).
- Go to Tools > Import data and select the import flow you need, either Customers or Invoices.
- After selecting the import flow, provide the file you downloaded from Workstaff. QBO will map the data and import it.

Precisions on customers import
The last step of the supplier's import is a recap of the data. You can add final modifications or remove lines. Any error, like duplicates, will be highlighted in red.
Precisions on invoices import
During the column mapping, you will be asked for:
- The date format. Select
D/M/YYYY. - The tax calculation. Select
Exclusive of tax.

The next step will be tax mapping, where you will be asked to match QBO tax code.
